| Step-by-step instructions for setting up email on Outlook Express 6. |
|
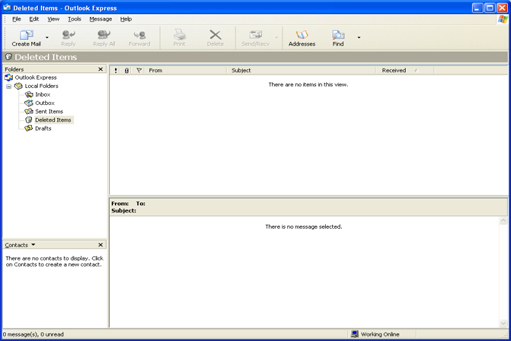
| Open Outlook Express |
| Step 1. Since no email is added, you will not see any mails (Fig. 1). Now you need to add your email account. Please follow the simple steps and in a couple of moments you will be ready to receive and send mails. |
|
 |
|
|
| Adding An Email |
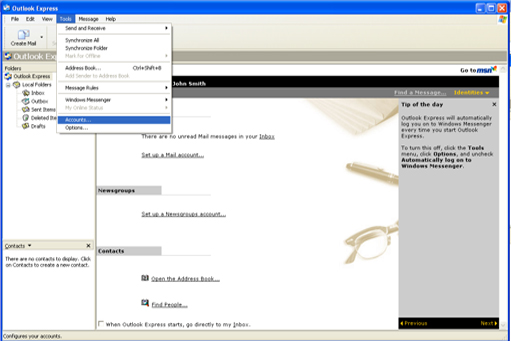
| Step 2. Click 'Accounts' from 'Tools' on the top menu bar (Fig 2) to open the 'Internet Accounts' pop-up window. |
|
 |
|
|
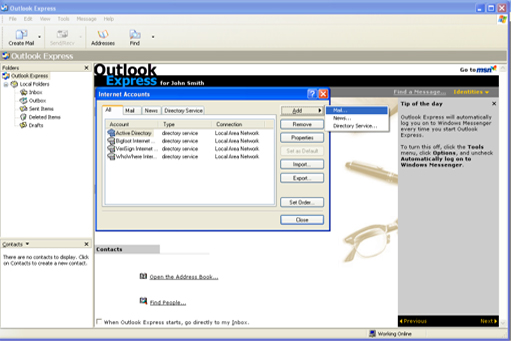
| Now a pop-up screen will open |
| Step 3. Now a pop-up screen will open. Click 'Mail' from the 'Add' button on the top-right hand side of the pop-up screen (Fig 3). |
|
 |
|
|
| Name |
| Step 4. When you click on 'Mail' (as stated above) a new 'Internet connection Wizard' pop-up window will open (Fig 4). Type your name as you want it to be displayed in the emails you will be sending to people and click 'Next.' |
|
 |
|
|
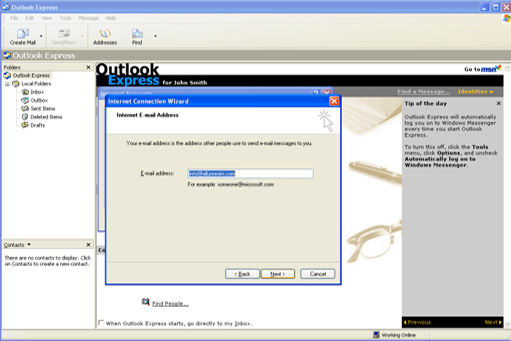
| Internet Email Address |
| Step 5. Here type the e-mail address you want to add (Fig 5). Please make sure that you type the entire email address. For example: xyz@abc.com and not just 'xyz.' Now click Next. |
|
 |
|
|
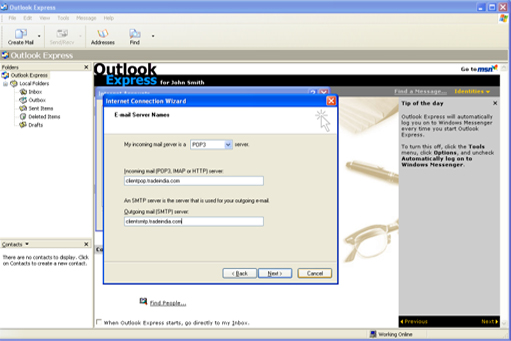
| Email Server Names |
Step 6. From the drop-down menu select 'POP3' for your incoming mail server. In the 'Incoming mail (POP3, IMAP or HTTP server)' field type: clientpop.tradeindia.com and in the Outgoing mail (SMTP) server, type clientsmtp.tradeindia.com. Please refer (Fig 6). Now click 'Next'.
|
|
 |
|
|
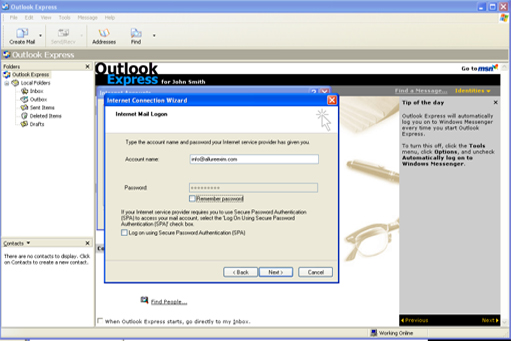
| Internet Mail Logon |
Step 7. Now enter the email id you received in email from tradeindia.com, leave the password field blank and remove the ember check box (As depicted in Fig 7) , and click the 'Next' button.
|
|
 |
|
|
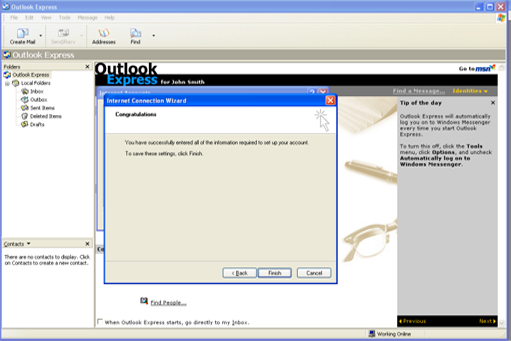
| You Have Now Successfully Entered Your Account Details |
Step 8.You have now successfully entered your account details. Click the 'Finish' button to save the settings (Fig. 8).
|
|
 |
|
|
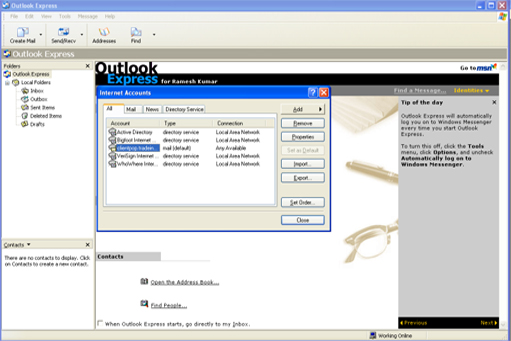
| Go to the 'Internet Options' (Refer Step 2) |
Step 9. Now select the 'clientpop.tradeindia.com' account, the click on Properties button (Refer Fig 9).
|
|
 |
|
|
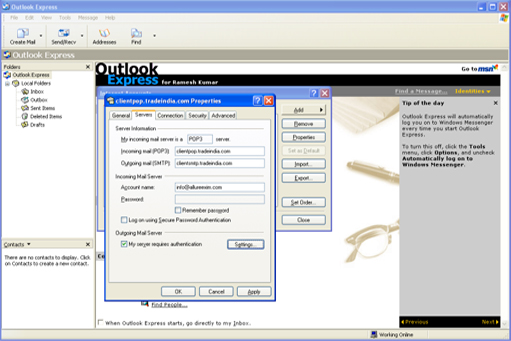
| A 'clientpop.tradeindia.com Properties' pop-up window will open (Fig 10). |
Step 10. Now go to the Servers tab and check-in the 'My server requires Authentication' towards the end of the pop-up window (Fig. 10).
|
|
 |
|
|
| When you click on this a new pop-up window will open (Please refer Fig 11). |
Step 11. Now click on 'Advanced' tab and check This Server requires secure connection (SSL)' in both the Outgoing mail (SMTP) and Incoming Mail (POP3) fields. Now click on Apply and the OK buttons (Refer Fig 11).
|
|
 |
|
|
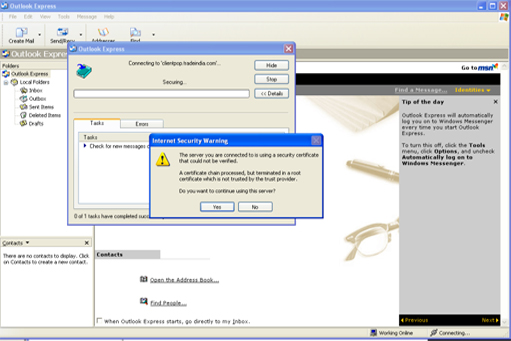
| A new pop-up window with a Internet Security Warning will be flashed which will ask you if you would like to continue using this server (Fig 12).
|
| Step 12. Now click on Send/Recv button, It will aks you for you account passowrd, enter your password, an Internet Security Warning will be flashed which will ask you if you would like to continue using this server (Fig 12). Click the Yes button. |
|
 |
|
|
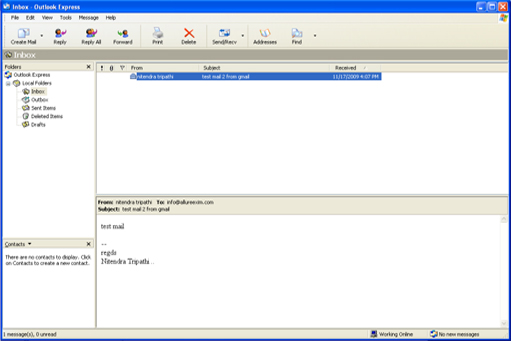
| Now you are ready to receive and send mails. |
| Step 12. If you have followed all the above instructions, your emails will start downloading in your Inbox and now you are ready to receive and send mails. |
|
 |
|
|

 08045800034